Mushrooms!!! And, Polyform Model Air Clay
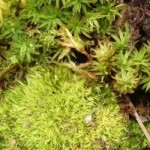
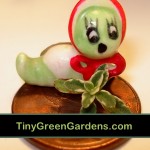
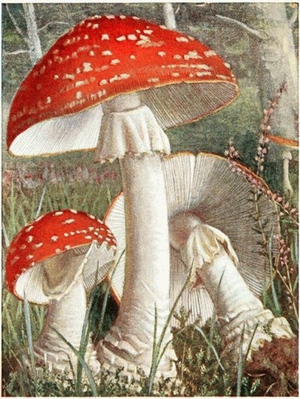 I just love having mushrooms in my fairy gardens and terrariums. Particularly, the red and white ones. This drawing shows what Amanita muscaria look like in real life.
I recently found a wonderful tutorial on making extra tiny versions of these mushrooms using paper clay.
I haven’t done much in clay. Partly because I already have so much fabric, yarn and beads I could open my own shop.
But, I’ve also stayed away from clay because I never thought I could make stuff anyone would do more than say, “So, what is that supposed to be?”
After watching Nichola’s tutorial – How to Make Teeny Weeny Mushrooms, I thought, I could actually create something that would look like mushrooms. She used a product called White Creative Paperclay – an air dry clay. Yay, no baking, no kneading for several hours to condition the clay. Just, open the wrapper and start creating.
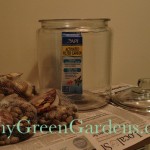
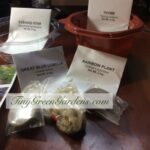
I didn’t want to wait. Our local craft stores aren’t all that local. So, I hit Wally-World and bought Polyform Model Air Dry Clay by Sculpey.
There were a number of Russian YouTube tutorials on making flowers with air dry clay. Oooo, something else that looked like, maybe, just maybe I could make something recognizable. Probably, not anything up to the level of the Russian ladies, but at least something that when someone saw it they would say, “Oh, you made a flower.”
Making Fairy Garden-sized Mushrooms
I went to grab my brick of clay only to notice the package had a slice in it. It did cut all the way through the plastic, but it wasn’t gaping open so I kept my fingers crossed that I might be OK. If you get nothing else out of this post…ALWAYS MAKE SURE, WHEN BUYING CLAY THAT THE PACKAGING IS INTACT!
I must have spent an hour gathering all of my supplies and preparing my work area. I felt like a kid with a special treat worth savoring. I was going to make mushrooms, little houses (another wonderful tutorial by Nichola), a turkey pin, pumpkins, flowers like the Russians were making and maybe even a teddy bear (another Russian tutorial). It was going to be so much fun.
Air-dry Clay
The clay seemed drier than I thought it should be and it didn’t have the texture of any of the videos I had seen. Uh, oh. OK, some additional moisture was called for. The Russian ladies used cold cream on their fingers to condition the clay and help keep their hands clean. And, the Sculpey site said to use a bit of water with their Polyform Model Air Dry Clay. I figured that I could get it back into shape with a little work.
 Well, no luck. It became either exceptionally sticky and unworkable or pretty much stayed where the edges were forever cracking.
Nichola’s wonderful tutorial didn’t work so well for the mushroom stems because I could not get a nice clean seam with the Polyform Model Air Dry Clay. I smoothed water over the surface and practically slathered the sides and still the seams just did not melt together. I would push the side of the pin up through the clay long before the seam melted together.
I remembered on one of the Russian videos, the lady worked with a snake with one end a bit thicker than the other. She created a beautiful flower in the fatter end and then put her florist wire down through the entire length of the ‘snake.’ Using a similar technique made my mini mushrooms a bit fatter but it didn’t leave me with a big striped seam down one side.
The caps were even more of a challenge to get the cracks out of. Again, it was smear, smear, smear the water around and hope to create a somewhat smooth surface.
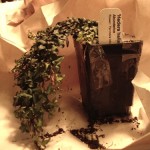
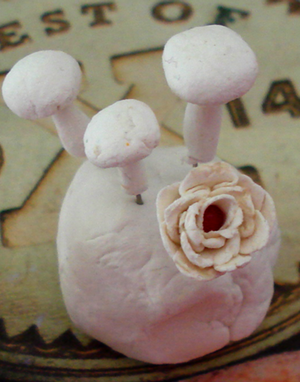
What Nichola was creating in a few seconds was taking me minutes just to get the clay to look decent. And, as you can see from my unpainted mushrooms, I still didn’t get nice smooth tops. The mushrooms and flowers are stuck into a ball of wet clay. You can see the sort of seams and cracks even the ‘fresh’ clay has.
Adding Color to my Mushrooms & Flowers
 The Russians used both paint and lipstick – yes, lipstick, to color their clay. They used a little smear of paint and it colored the clay nicely. I added the same amount of paint and it pretty much did nothing.
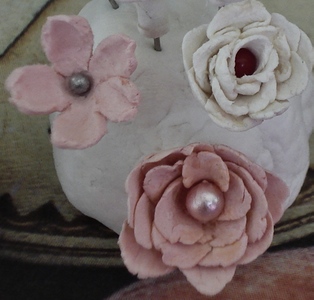
It took quite a bit of acrylic paint to get some nice color. I had to do far more kneading than what they showed in the videos. The flowers and little pots I made with colored clay dried much rougher than the stuff I left plain.
The Polyform didn’t stick to itself well. Without PVA glue, nothing I made would have held together. It didn’t shrink but as it dried the colors faded. The orange is turning yellowish.
The pink is definitely not the color it was when wet. All of the pieces have a rough look to them. On the bright side, I suspect it would work great as mortar for a brick path or stone wall. It would have the rough edges like real mortar and has a similar color when dry.
I’ll probably be returning the clay to Walmart. It was damaged and it did not look like the consistency of any of the air dry clays that I saw folks working with.
I will probably be making the trek to Michael’s or ordering from Amazon the Creative Paperclay for Modeling Compound, 16-Ounce, White I should have used in the first place. I’ll probably try it and then make the final decision on what to do with the Polyform.
The mushrooms were super fun to make even if each one took me as long as Nichola’s entire video tutorial to make.