Make Your Own Fairy Garden Fence – Part I
 A recent score at Michael’s included a bit of metal fairy garden fence. While digging in my crafting stash looking for head pins to make some more mushrooms with, I came across a bag of miniature popsicle sticks. They had been in my stash for years just waiting for something cool to make with them.
One thing led to another and I had an idea.
Fairy garden fence!
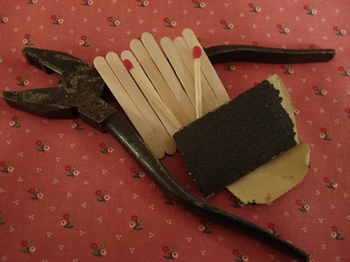
Supplies

So, with my little sticks and some wooden matches, I was in business – the fence making business that is. If you don’t have the fence posts in your stash – here’s some cute miniature popsicle sticks on Amazon.
I also needed a bit of sandpaper and something to cut fence posts and support rails with – I used a wire cutters. And, I needed a bit of glue and paint to complete the project.
If you have it, a bit of painter’s tape comes in handy too.
Creating the Fence Pickets
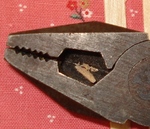 As you can see in the picture, I used an ancient wire cutter to shape my wooden materials.
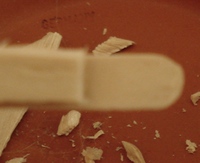
There were a few pieces that snapped off and flew across the room – you’ve been warned). But for the most part the shape of the cutter caught the trimmings and made it easier to clean up the bits and pieces. I also used a little bowl to catch the cut bits and pieces.
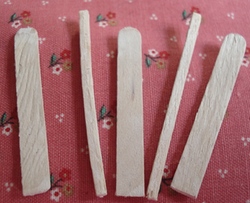
Through trial and error, I learned the best way to get similarly sized pickets was to trim one the way I liked and use it as a template for all of the others. Be sure to use the same picket each time as your template. If you use the 2nd one to cut the 3rd and then the 3rd one to cut the 4th, you’ll end up with pickets that all progressively get a little bigger than the last one.
Using a pencil to mark where you want to cut works too. But, if you plan on whitewashing or otherwise staining the wood, it might show through.
Painting Your Fairy Garden Fence
 Speaking of staining, I would suggest you try a few different techniques and color combinations before you paint your fencing. Better to lose a picket or two to a painting option you don’t like than an entire section of fence.
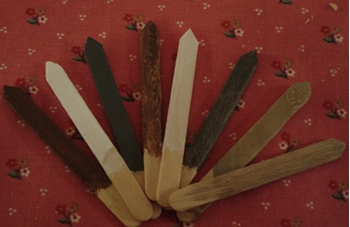
Here’s a photo of my samples. The first three on the left were simply painted and left to dry. The second three were painted and then I wiped off some of the paint with a paper towel. The last two used watered down paint. I think the extra water helped to raise the grain a bit, so that is the way I’ve been painting mine.
The biggest thing is painting in the direction of the grain. Yes, we’re not making furniture here, but it does look better when things are painted/stained nicely. You can see from the brown/wiped painted picket example what it looks like when the paint is smeared in different directions.
After you have cut your pickets and trimmed off the flammable portion of the matches, sand all of the cut bits. You’re not going for perfect. If the wood splits a little here and there, that just adds a bit of character to your fairy garden fence. Double check the length of your matches/rails against the width of your fence section. They might need a bit more trimming to fit. Hint…if you need to trim the matches by just a little bit, sanding the ends works better than trying to cut them again.
When to Paint Your Fairy Garden Fence
You can either paint each of the pieces prior to assembly or paint an assembled section of fence. Both have their pros and cons.
 Painting before assembling your fence. I held the little pickets between my thumb and index finger and then used a brush to paint them. The diluted paint water got all over my fingers. I gave up on the brush and just ‘painted’ the tips with my fingers. The easier part of paint washing the pieces first is that you can lay the pieces down without too much worry about ruining the paint.
This is definitely the messier option. But, it will raise the grain of the wood on some of the pieces.
 Painting after your fence is assembled. Painting the pieces once the fence is assembled takes less time.
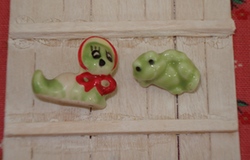
The biggest issue for me is that is showed every last bit of glue that escaped from behind the match sticks. Tim and Gerty showed up to check out my paint job and they weren’t particularly impressed. Glopping on the glue to ensure everything stays together is definitely not the way to make a nice fairy garden fence.
I also noticed that the moisture caused the wood to expand a bit and one section of my fairy garden fence has a bit of a bulge in it. I think it adds a bit of charm but that’s just me.
Fairy Garden Fence Assembly
 I’ll leave you now to paint your pickets and supports. I left mine overnight to ensure they were dried before moving on the the next step.
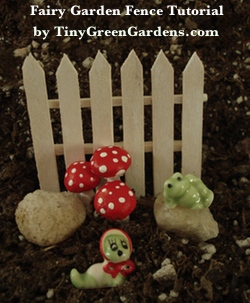
Here’s what the finished product looks like when positioned with a few of the mushrooms I made in an earlier post. Tim and Gerty appear to approve of my white fairy garden fence. Hopefully, your fairies will too.
Tomorrow, I’ll share how to assemble your fairy garden fence in Building a Fairy Garden Fence – Part II.