Adventures in Palm Tree Making
I’ve always been fascinated by little things like miniature plants and other hand-crafted, smaller copies of the world around us. Most of my crafting endeavors are tiny projects. Don’t misunderstand, tiny does not mean quick. Tiny projects can take just as long, if not longer, than larger things.
Miniature palm tree making turned out to take far longer than I thought it would but I also have learned a number of ways to streamline things.
First of all, let me share the inspirations…
 A tutorial in the form of a forum post on Military Modelling that taught how to make a model coconut palm tree. It was the primary inspiration for my tree making. His tree has 30 fronds, mine ended up being 12. More is certainly better with a project like this. His leaves also appear to be much narrower than mine. Plus, he used air dry clay for the trunk. He spray painted the leaves, added some coconuts and painted the trunk too.
Titanic in Miniatuur, a blogspot blog all about one artisan’s endeavor to recreate the Titanic, complete with all of the fine furnishings that graced the luxury liner. He shared how he created ivy growing on a trellis and palm trees. Amazing work, worth visiting just to see what this artist has created.
Crafty Me had shared her techniques for creating alcohol ink with drug store alcohol and food coloring. I had wanted to play with alcohol ink for a while and this seemed like the perfect project for it. (mistake #1)
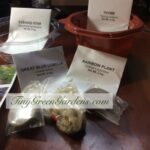
Palm Tree Making Supplies
A4 white typing paper (mistake #2)
craft wire (mistake #3)
bamboo skewer or rod
white glue (mistake #4)
food coloring
rubbing alcohol
I thought it would be fun to combine two projects into one. Looking back, my desire to avoid using paints and the idea to create an unevenly colored leaf were definitely a case of trying to run before learning to walk.
But, let’s get to the how it was done before examining what went wrong.
First I took a standard sheet of copy paper. I folded it in half length-wise to create two half’s measuring 4.25 x 11. I created a sharp crease and gently tore along the crease. (Much faster than measuring and cutting with scissors.)
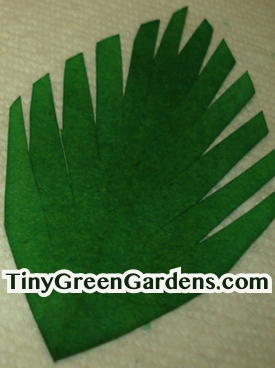 I then took the half, folded it in half again to 2.12 x 11, creased and tore it.
I took the quarter sheet and folded it in half to 2.12 to 5.5, creased and tore it.
I took the eight and folded it in half to about 2.12 x 2.25, creased and tore it.
That gave me 16 leaves.
I took each piece, folded it in half to about 1.06 x 2.25.
I then cut out half an oval to create a general leaf shape. Being careful not to cut all the way through the center, I made 5-6 slices down each side. I opened the fold and cut down the top.
To make it look a little more shaped, I trimmed a bit off of the bottom of each frond.
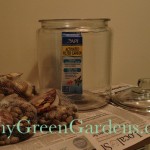
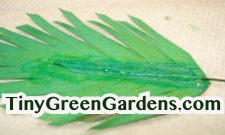
Dying the Leaves
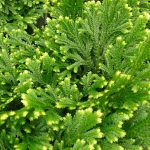
All of the leaves got dunked in the alcohol die. It took several dips and a lot of food coloring in a small amount of alcohol to get a darker green color. You can see what I ended up with here on the right – a slightly mottled green leaf. I had used all 4 colors of die to eventually get a dark green (didn’t want to use up all of the green on one project). It created some splotches of yellow and brown here and there on the leaves – exactly the thing I was hoping for.
I then went back with my scissors and cut each of the fronds in half to make it more bushy. (I had left them larger in hopes to make them easier to handle when wet. At least, that’s my story and I’m sticking to it.)
Assembling My Palm Tree
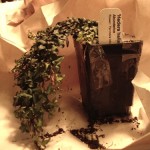
I couldn’t find my stash of straight wire, so I used some green wire I had. That created all sorts of problems. Ended up having to sacrifice a pair of leaves to help seal the wire to the leaves. See photo.
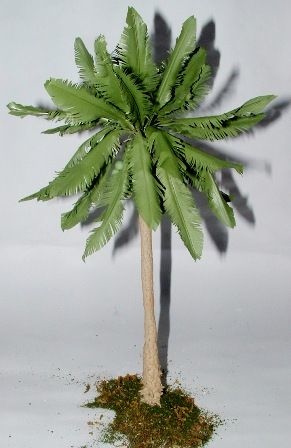
I bundled the leaves around a thin bamboo skewer – I think it was actually a bit of basketry that I picked up at a thrift store. I wrapped the bundle in green florist’s tape. It looked a bit too thin and looked a bit flat. So, I added some pieces of thin electrical wiring and wrapped the tape around the entire mess to make a thicker trunk. I then added a bit of extra coils of wire at the top to mimic the way palm trees have a larger area at the base of the leaves.
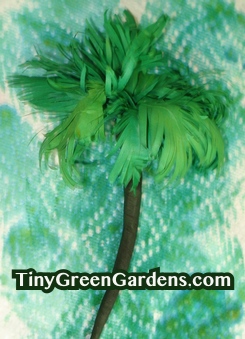 Overall, I think it came out cute. It’s around 8 inches tall, not including the exposed bamboo for standing it in something and about 4 inches wide at the widest point of the leaf canopy.
Lessons in Tree Making
OK, let’s discuss things I did that made things more difficult…
Mistake #1 The alcohol die.
Maybe not totally a mistake but certainly not sure the look was worth the time, effort and mess; not to mention the risks involved using food coloring. Love the mottled, uneven color. Hated that gluing the stems/wire on leached some of the die out.
The leaching only happened on some of the leaves. I used a bit of green marker to blend the color and make it look less like my palm tree had some sort of disease. The fellow on the military modelling forum constructed his leaves, with the stems, and then spray painted them. Creates a bit of a uniformity of color but his leaves have a bit of a waxy, more natural look.
Mistake #2 – the paper
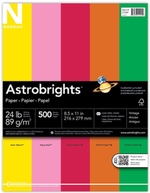 The plain, white copy paper. sigh. I’ve since purchased a multi-color assortment like this one Neenah Astrobrights Premium Colored Paper – I thought this one would be useful for flowers and other projects. They offer several different colored assortments, 6 of which include at least one green. As I’m writing this post, I’m sorry I purchased mine at Staples, it was $3 more there for very similar colors. (If you do shop for colored paper for this or other similar project, be mindful of paper weight. Card stock, in color, seems cheaper than 24lb standard paper.)
Mistake #3 – the wire
Using spooled craft wire – save yourself the headache and wrestling match. Get some straight stuff. You still might have to add a bit of a paper pocket to secure it in place but at least it will lay flat on your work table. Of course, the paddle wire I used was cheap. The flat, floral wire isn’t. But, this looks like one of the best offerings on Amazon – 300 18 inch-long pieces. Best part is they come in a protective tube to help ensure they stay straight until you use them. For this project, I would cut them in half.
Mistake #4 – the glue
Used regular white glue. Should have used tacky glue or something that dried quicker and I might not have needed to sandwich the wire between two pieces of paper.
Idea #1 – paper sandwich
Not sure if it would work or not but if I were to have another go at palm tree making, I would try sandwiching paper over the wire. I would experiment with tissue paper and glue it completely as well as trying colored copy paper only glued near the wire.
Idea #2 – size matters
My tiny green gardens have all been inside creations. That means they are fairly small. While my page ripping technique made this a super easy project – no measuring is always good, it did make a tree too large to be included with any of my little gardens.
The same general technique with smaller pieces of paper and a tiny scissors may produce something even cuter.
Making Tiny Palm Trees
Since first writing this post, I’ve been talking a lot about a beach house kit that I found on Amazon. The kit included materials and instructions for making a pair of palm trees. They’re only 9cm and 7cm tall. The technique is pretty much the same but the materials used create a cuter end product – at least I think they do. You can see them here.